
As Social Studies education has transformed in the past few years, I’ve found that I need to have my middle school students analyzing documents almost every day of the year. Simply having students read and answer questions becomes tedious and boring after a week of class. Therefore, I’ve developed quite a few strategies to “trick” my students into reading and analyzing text. Honestly, the more I’ve introduced these strategies for primary source analysis, the more I’ve seen my students engaged and involved. My classroom has become much more student-centered in recent years, and that makes me really happy.
Before I utilize any of these strategies, I make sure that the documents read at a level that is accessible to the students. These strategies simply won’t work if the reading level is too far out of their reach. Many primary sources require editing and modification.
Here are 10 strategies that I’ve added to my idea bank to encourage primary source analysis:
- Document Stations: With this strategy, students travel around the room to visit different stations relating to a topic. For example, with my Slave life stations, students visit 8 different locations that d
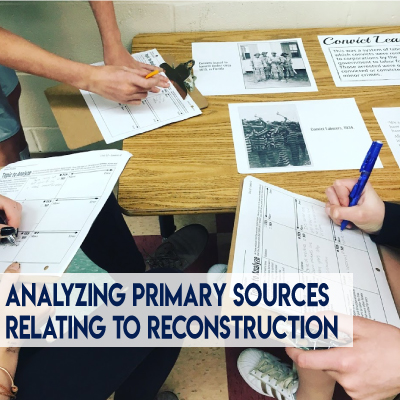 iscuss slave life. The students are handed a graphic organizer at the beginning of class, and as they visit each station, they’ll add information. If the information is more visual, I might add it to the wall, if the information includes more text or close analysis, I may have students gather at seated stations instead. This strategy gets students up and moving, and frankly, as long as I check in with each station, I barely have to do anything! Students will interact and discuss the text without my presence.
 - History as Mystery: Students are more likely to be engaged if they aren’t discussing “dead” history. Most topics in history haven’t really been “solved” by historians. Present students with a particular topic that hasn’t been solved. Then, add in various pieces of evidence that lean towards one theory or another. In some cases, you might give students the particular theories at the beginning. In other situations, the students can figure out the theories on their own. As each additional piece of evidence is weighed, students can form their own conclusions about the answer. This process can be simplified or made more challenging depending on the grade level of the students.
- Document Categorization: In this scenario, students are presented with a variety of opinions about a particular event in history. I’ll give students a list of groups, and then the students have to manually arrange the documents on their desks to match the groups. I might do this five more six times with the same documents. Topics can vary wildly depending on the subject. Some of the ones I’ve included in the past are point of view, gender, for or against, type of source, or “biased” or “objective.” This way, the students are reading the same documents over and over for recategorization. You can treat this like a game and give students small prizes if they are correct.
- Treat the Documents as Evidence: In this scenario, you might have the students investigate the actions of a particular person in history. The documents are evidence that the students can utilize in a mock trial. In this type of lesson, the evidence comes alive as students work to convict or exonerate the historical figure (or figures) on trial. There are so many historical figures that deserve a trial – have the students give them one!
- Broaden your definition of “Document:” Some days, I just want to have my students analyze, and given them a break from reading. Songs are fantastic to analyze, especially, if they are juxtaposed against each other and students compare genre, style, and word choice. Pieces of art works great also. Turn your classroom into a gallery, and have students react to the art on the walls. There are many time periods that are represented strongly in art, including the Renaissance, the Harlem Renaissance, the Medieval Ages, the Greeks, or the Romans. This can be done digitally, or with actual paintings around the classroom.
- Use Cartoons: Students are much more eager to react and respond to cartoons than they are to text. Show them a cartoon as a bell ringer, and ask them what they see. I like to use specific terms to have students analyze cartoons (Symbolism, Exaggerated Features, Sarcasm, and Stereotypes). This way, they have an easy vocabulary to
 return to every time they see a cartoon.
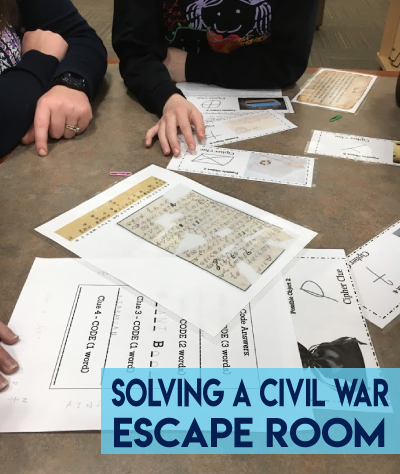
 - Escape Rooms or Breakouts: These activities can be more tedious to set up, but kids just love them! There are easy ways to work primary sources into breakouts. Have students categorize documents according to point of view, then include the code within the text of the correct documents. Have students analyze a painting, and include the code within the painting or the code is the message of the painting. Students can use directions to look at a digital map for a clue (Google Earth works really well here.) The possibilities are endless, and your students will love feeling like they’re on an episode of the Amazing Race!
- Have students “translate” text into modern lingo: Any time students have a chance to use social media in the classroom, they jump at the possibility. Give them some primary sources where two historical figures are engaged in a linguistic battle. Students must translate the text so that they understand what the historical figures were arguing about, and the way in which they made their arguments. Then, have the students imagine a similar argument using modern social media. The students could lay out a twitter battle (with hashtags, of course!). Or, they might become the historical figures, and record a snapchat conversation. By translating the text, students will be conveying the original message of the documents, and showing that they understand those documents.
- Have students become the source: Each student may be assigned a unique historical figure. Instead of having a long and involved research project, just give each student one source to learn about their person, and make sure each person assigned is associated with a general theme or event. Then students might each interview each other to find out how they feel about the topic at hand. Students will travel around the room, and visit with 5 or 10 others depending on the time available. With one document per student and one topic per class, the conversations can be short and to the point. Students will be able to gather a large amount of information quickly. I could see this working well with a topic like immigration (interviewing immigrants about why they immigrated), or individuals from the Great Depression (what went wrong, how they’re surviving), or people reacting to an event (like Kent State or a crowd at a Vietnam protest).
- I lied – Really this list is 9 ideas: What am I missing? What have you done with your classes to make sure that historical analysis is fun and engaging? How are you teaching your students to become historians? Add your suggestions to the comments below.

2 Responses
What document/worksheet/task sheet do you use during stations? What document do you use for students to answer the compelling and supporting questions?
Hi! I create specific worksheets and graphic organizers for students to complete as they visit the stations. Each activity is different, and it follows the documents for that specific lesson.